Free Download Your Desired Softwares and Apps From GetintoPC
How To Install Repair Version Of Windows 11
In this article, we will learn how to install repair version of Windows 11 to fix common system issues without losing your files or applications. Repair installation can resolve errors, slow performance, or corrupted system files while keeping your data safe.
What Is a Repair Install?
A repair install reinstalls Windows 11 using the same version that’s already installed on your computer. It replaces any damaged or missing system files while keeping your documents, photos, applications, and preferences intact.
Unlike a full reset or a clean installation, this method is designed specifically for fixing issues rather than starting over from scratch. You can think of it as giving Windows a fresh coat of paint without rebuilding the entire house.
You might consider a repair install if:
- Windows updates fail repeatedly.
- System files become corrupted.
- Built-in features or apps stop working correctly.
- Your PC has slowed down for no clear reason.
- Other troubleshooting steps (like SFC or DISM scans) haven’t helped.
Requirements
Before you begin, make sure you have the following:
- A stable internet connection
- A USB drive (at least 8GB) or ISO file of Windows 11
- Administrator access to your PC
- Backup of important files (recommended)
- A stable internet connection is available.
- Third-party antivirus programs are temporarily disabled or uninstalled to avoid interference during the installation.
- You have at least 20 GB of free space on the system drive.
Method 1: Repair Install Using Windows Update
If your computer still runs well enough to access Settings, this is the simplest way to perform a repair.
- Open Settings from the Start menu.
- Go to System > Recovery.
- Under the recovery options, look for Fix problems using Windows Update (the wording may vary slightly).
- Click Reinstall now and confirm when prompted.
- Windows will download a fresh copy of the same version you’re running and reinstall it automatically.
- Once finished, your computer will restart, and your files and apps will still be there, only Windows itself will have been refreshed.
Method 2: Repair Install Using an ISO File or USB Drive
If the system is too unstable for Windows Update to work properly, or if you want more control over the process, you can use installation media instead.
Step 1: Download Windows 11 ISO
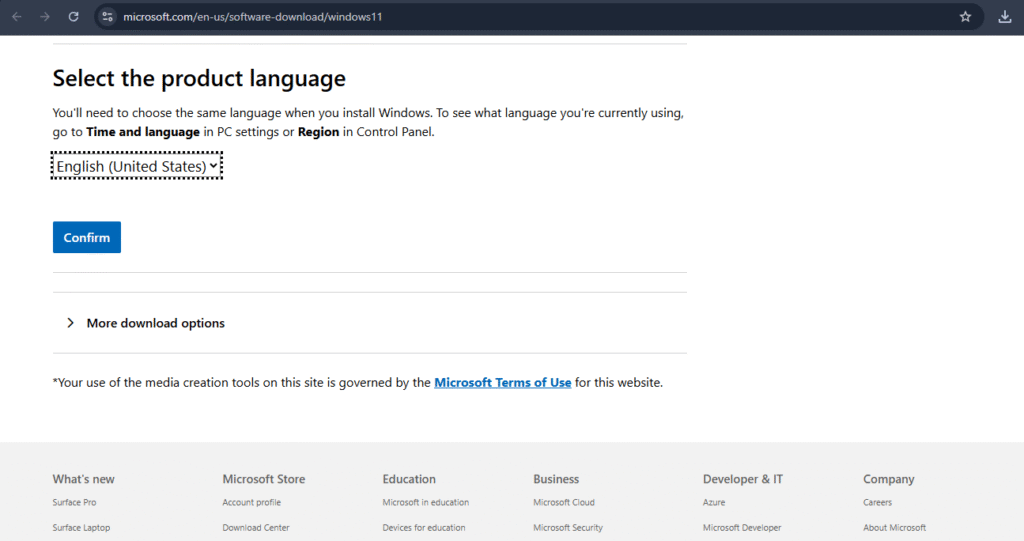
- Open a web browser and go to the official Microsoft download page: Windows 11 Download Page
- Scroll down to “Download Windows 11 Disk Image (ISO)”.
- Select Windows 11 (multi-edition ISO for x64 devices) and click Confirm button.

- Choose your language and click Confirm button.
- now, click on 64-bit Download button.
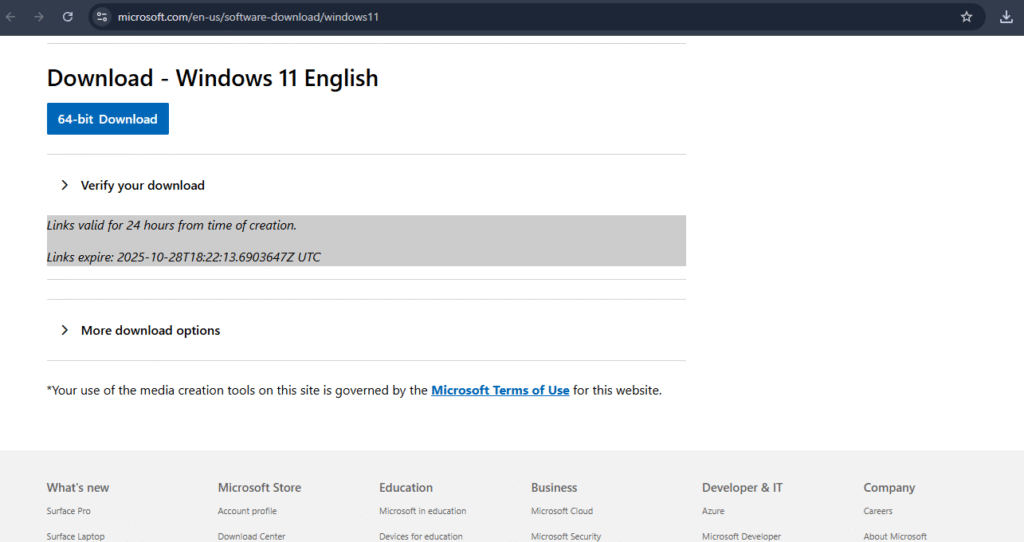
- Save the ISO file to a location where you can easily access (like Desktop or Downloads folder).
Note: Windows 11 ISO file download size is around 7–8 GB, so that it might take a while depending on your connection.
Step 2: Mount the ISO or Prepare Installation Media
You have two options:
Option 1: Use the ISO directly
- Locate the ISO file in File Explorer.
- Right-click and select Mount.
Note: When you select mount ISO file, windows will open it like a virtual DVD. You’ll see a new “drive” under This PC with a Windows setup icon
Option 2: Create a bootable USB (Optional)
- Go to the official Microsoft download page: https://www.microsoft.com/software-download/windows11
- Scroll to Create Windows 11 Installation Media.
- Insert a USB drive (minimum 8 GB).
- Click Download Now then file will start downloading.
- Run the Media Creation tool and accept license terms.
- Select Create installation media (USB flash drive).
- Choose your preferred language and edition.
- Follow the prompts to create a bootable USB drive.
Step 3: Start Windows Setup
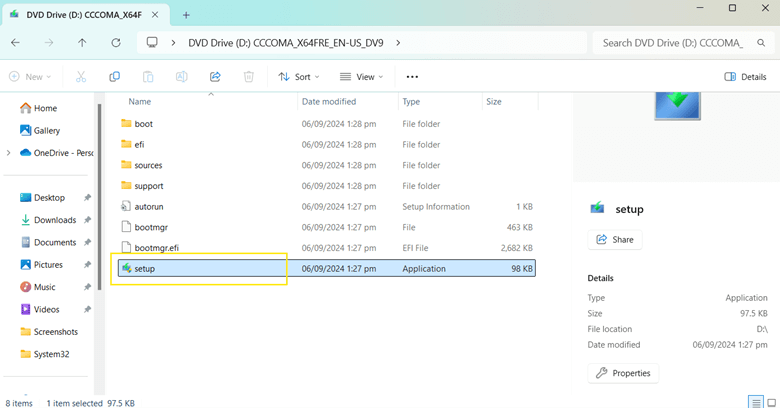
- Open File Explorer and go to the mounted ISO or USB drive.
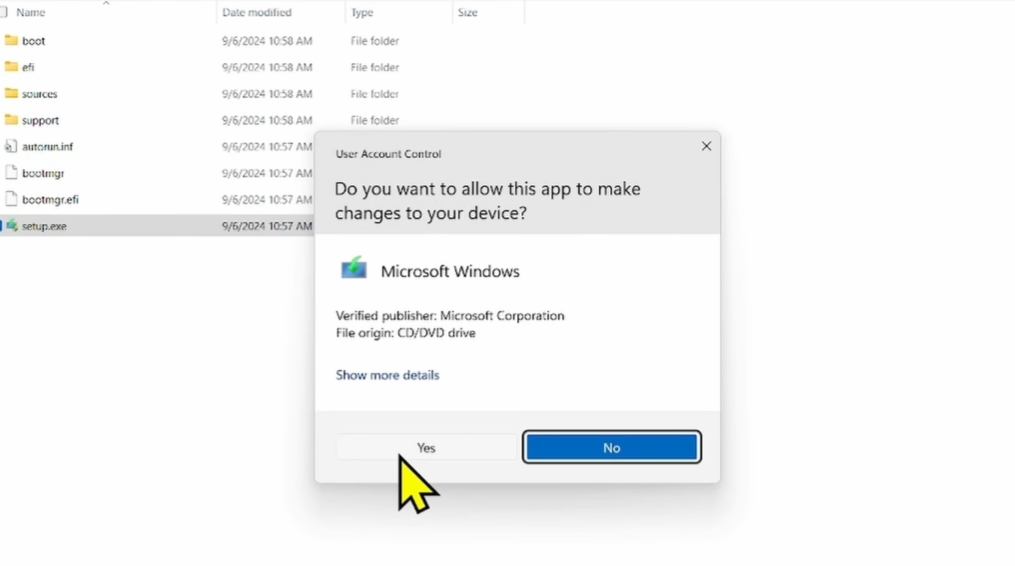
- Double-click setup.exe to launch Windows Setup or you can Right-click on setup.exe and select open.
- Windows may ask “Do you want to allow this app to make changes to your device?”
- Click Yes.
Step 4: Install Windows Setup
- The installer will check your system and load necessary files.
- This may take a few minutes, depending on your system speed.
- Now you can click on Next or click on change how setup downloads updates where you have two options:
- Download updates, drivers, and optional features (recommended).
- Not Right Now
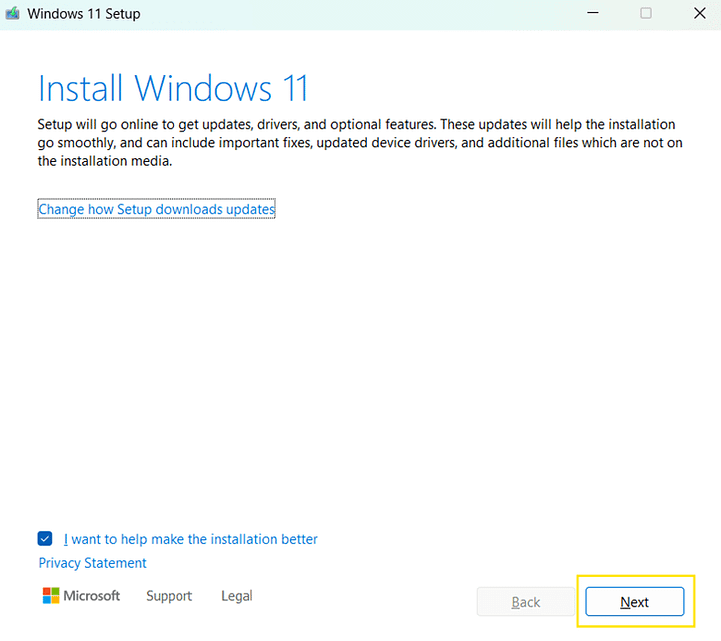
- Now Select Option which you need then click on Next.
- windows get something and check your pc, after that click Next.
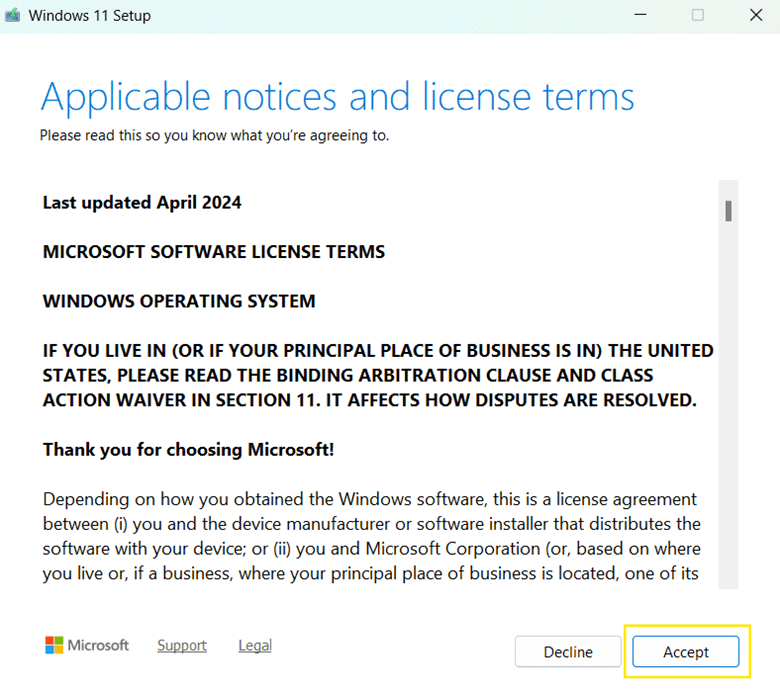
Step 5: Accept License Terms
- Read the license agreement carefully.
- Click Accept to continue.
- You cannot proceed without accepting the terms.
- Wait for Windows to check for updates.
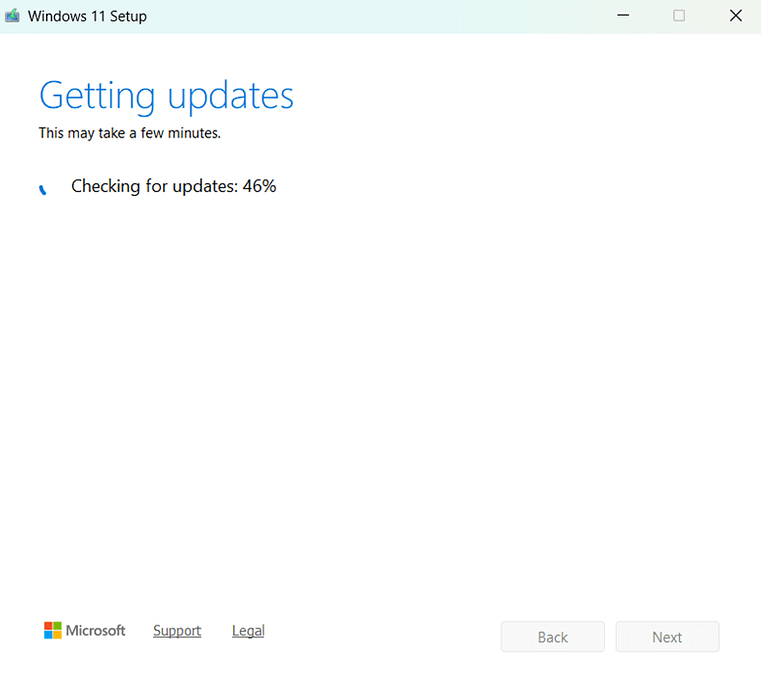
- The installer will confirm compatibility and show the Ready to install window.
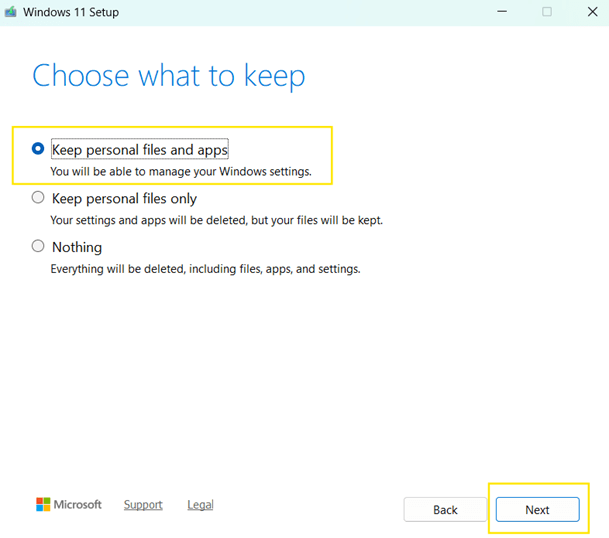
Step 6: Choose What to Keep
Windows Setup will prompt “Choose what to keep”. Options include:
- Keep personal files and apps → Recommended for repair installs.
- Keeps all apps, files, and settings intact.
- Keep personal files only → Preserves files but removes installed programs.
- Nothing → Clean install (erases everything).
✅ Select Keep personal files and apps for repair.
- Click Next.
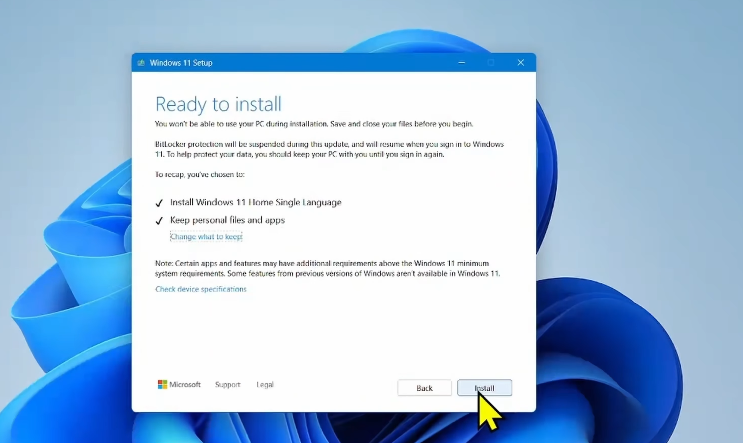
Step 7: Ready to Install
- Setup will show a summary of what will happen.
- Edition of Windows 11 to be installed
- What will be kept
- Free space required
- Verify everything is correct.
- Click Install to begin the process.
Step 8: Installation Process
- Windows will start copying files and installing.
- Your PC may restart multiple times automatically.
- Do not turn off your PC during this process.
- The process can take 30–60 minutes depending on your system.
Step 9: Complete Setup
After installation:
- Windows will display the “Welcome Back” screen.
- Follow on-screen prompts to:
- Configure privacy settings
- Sign in with your existing Microsoft account or local account
- Configure network settings
- Windows will load your desktop with all your previous apps, files, and settings intact.
Step 10: Post-Repair Steps
- Run Windows Update:
- Go to Settings → Windows Update → Check for updates
- Install all updates to ensure your system is up to date.
- Check Device Manager for missing drivers:
- Press Win + X → Device Manager
- Look for any warning icons and update drivers if needed.
- Restart your PC to ensure all changes are applied properly.
Tips for a Smooth Repair Install
- Ensure your PC is plugged into power during the process.
- Temporarily disable antivirus if installation fails.
- Make sure the ISO matches your current edition and architecture (x64).
- Avoid interruptions; turning off the PC mid-installation may corrupt the system.


")